An Introduction to Game States in Love2D
After going through countless blog and video tutorials on getting started with Love2D, I found it sad that most people would not take the approach of implementing game states right from the start, or would try to mimick this functionality in a “dirty” way.
After lots of time of reading many forum posts and library documentations. I found a way to implement game states in my games that I am very satisfied with.
In this post I will go over how to implement game states and some of the most common game states seen in games, in such a way that your code is remains organized and neat.
Game States With Stateful.lua
We will be using a simple but great Lua library called Stateful, made by kikito. This library will allow us to easily implement and work with game states inside our game.
This library also depends on the Middleclass library (also by kikito). Middleclass will allow us to construct and develop our game in a OOP (Object Oriented Programing) fashion. If you are familiar with OOP then you will love this approach.
Basic Game Structure
With Stateful, what we really want to achieve is that we can create different and separate (separate files) states that will contain different attributes and methods. Moreover, each and every state will have its own update() and draw() functions that will work just like love.update() and love.draw(). The key thing here though is that each state will be able to draw itself in a different way.
With this approach, we will also want our main.lua to be as clean as possible. Meaning that it won't contain anything else other than declarations for the usual functions that are used (the ones mentioned above):
class = require 'lib/middleclass'
Stateful = require 'lib/stateful'

require 'game'

local game

function love.load()
  -- Launch Game starting at Main Menu
  game = Game:new()
end

function love.update(dt)
  game:update(dt)
end

function love.draw()
  game:draw()
end

function love.keypressed(key, code)
  game:keypressed(key, code)
end

function love.mousepressed(x, y, button, istouch)
  game:mousepressed(x, y, button, istouch)
end
As you can see, main.lua simply globally requires Middleclass and Stateful, creates a new instance of Game (Class definition of this class is found inside game.lua), and then proceeds to pass the same functions to game.
This way, main.lua will be nothing but a clean entry point that quickly delegates responsibilities to Game. Let's take a look at this Game class:
--- game.lua

Game = class('Game'):include(Stateful)

require 'states/menu'
require 'states/pause'
require 'states/game_over'

function Game:initialize()
  self:gotoState('Menu')
end

function Game:exit()
end

function Game:update(dt)
end

function Game:draw()
end

function Game:keypressed(key, code)
  -- Pause game
  if key == 'p' then
    self:pushState('Pause')
  end
end

function Game:mousepressed(x, y, button, isTouch)
end
Game will be the real starting point of the game. And will act as a parent for the other states.
We begin by globally creating the Game class using Middleclass, and then declaring that it contains states, using the Stateful include(Stateful) mixin.
-> In Lua, all variables declared without local keyword are declared as global.
After this we proceed to require the code for the states we will implement in this post. These are menu, pause, and game over. Very common game states in basically any game.
The initialize() function is provided by Middleclass. It allows us to create a function that will act as a constructor for this class, mimicking a similar approach as to when programming in Ruby. The colon accessor : allows us to implicitely pass a self which we can use to assign instance attributes, like in Python.
In this constructor we are immediately switching to another state called Menu (for the main menu) using Stateful's gotoState() function. The Game instance created in main.lua will go to this state as soon as it is created.
The rest of the code is basically repeating the same functions we saw before. This is because main.lua will call these functions.
In the game's keypressed() function we are also going to another state called Pause using Stateful's pushState() function.
The State Stack
When declaring that a class is stateful, Stateful.lua will proceed to manage a stack for this class. States can be pushed into the stack and popped out of the stack.
When using gotoState(), all states found inside the stack of a certain class will be popped out. Lastly, the state passed to this function will be pushed in.
When using pushState(), the state passed to the function is simply pushed to the stack. All the previous states will still be in the stack.
The state in the top most position will have the highest priority, and will represent the current state the class is in.
The Menu State
As soon as a game instance is created in main.lua, the class switches to the Menu state. Let's take a look at the code for this state:
-- states/menu.lua

local Menu = Game:addState('Menu')

function Menu:enteredState()
end

function Menu:update(dt)
  -- You should switch to another state here,
  -- Usually when a button is pressed.
  -- Either with gotoState() or pushState()
end

function Menu:draw()
  -- Draw your menu stuff (buttons, etc.) here
end

function Menu:keypressed(key, code)
end
You can see how all these state objects look very similar and contain update() and draw() functions.
The enteredState() function allows us to do useful things when the game switches to this state.
Notice how we are delcaring the keypressed function blank. This is important because in Game's keypressed function, the game will be paused when the p key is pressed. Since it makes no sense to pause the game when we are in the menu, we want to disable this functionality. We do so by delcaring this function blank.
This means that states that belong to Game will inherit these functions!
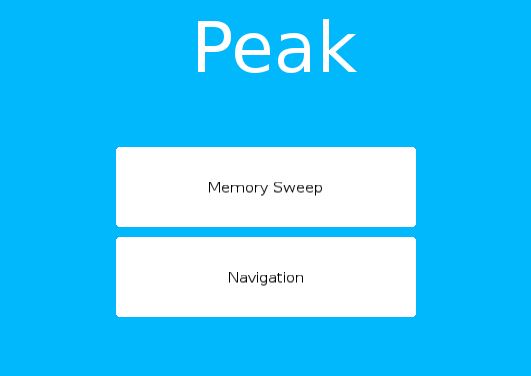
The drawing and update functions logic are pretty much left up to your implementation. For a project I am working in, I came up with this main menu state:
The Pause State
The pause state is entered when the p key is pressed in the game. This is done using the pushState() function which simply pushes the new state into the stack.
-- states/pause.lua

local Pause = Game:addState('Pause')

function Pause:enteredState()
end

function Pause:exitedState()
end

function Pause:draw()
  love.graphics.setBackgroundColor(BG_COLOR)

  love.graphics.setColor(0, 0, 51, 100)
  love.graphics.rectangle('fill', 350, 200, 200, 50)

  love.graphics.setColor(255, 223, 0)
  love.graphics.printf('GAME PAUSED', 350, 220, 200, 'center')
end

function Pause:keypressed(key, code)
  if key == 'p' then
    self:popState('Pause')
  end
end
Again, we see the enteredState() callback function and the usual draw() and update() functions. Nothing important here.
What I really want to show from this state is how we unpause. Naturally, by pressing the p key again. When this happens, the keypressed function is called, and then Stateful's popState() function is called as well, indicating which state we want to pop: the current state.
This is another example of how to manipulate the state stack through all the different states available. By using popState() we just remove the current state and go back to the previous state, whatever state that is, usually it would be a state where we are actually playing the game.
Conclusion
With this knowledge you can implement pretty much any other state. The key is to know which function you should use to switch to the state, either gotoState() or pushState().
It is also important to remember that the state objects will inherit the functions declared in the “parent” object, in this case Game. This means that in state objects that belong to game, the game can be paused through the keypressed function. If you don't want the game to be able to be paused in a certain state (like menu), then you should overwrite this function.