Implementing Auto Updates for a Netbeans Platform Maven Application Using Github Pages
Being able to update an application when a new version is released is something of critical importance for desktop applications. Otherwise, the process of updating the application is extremely tedious since you have to download more installers all the time.
Luckily, Netbeans Platform comes with integrated support for enabling your custom applications to be able to be updated when a new version is released.
In this post I will go over how to implement this on a Maven based Netbeans Platform application.
How Netbeans Update Center Works
The Update Center is how we can achieve this functionality. The way it works is that you publish your module's NBM files to a web server, along with a XML catalog file that contains information about the modules such as latest release timestamp, latest version, etc.
When you configure an update center in your application, you will configure this web server's URL so that the update center client knows where to poll and where to download the new module files to install.
Generating Catalog File and NBM Files
First we will generate the necessary files that need to be uploaded to the web server. I discovered that out of the box, Maven will generate NBM files of modules, thanks to the nbm-maven-plugin plugin included in your application's POM file. However, I could not find the XML catalog file anywhere.
I found a solution that will generate this XML catalog file and all the NBM files all in a single location.
Basically you need to add the following configuration in your application's POM file, inside nbm-maven-plugin.
<executions>
  <execution>
      <id>updatesite</id>
      <phase>package</phase>
      <goals>
          <goal>autoupdate</goal>
      </goals>
      <configuration>
          <fileName>updates.xml</fileName>
      </configuration>
  </execution>
</executions>
Then you can right click on your application and run the Build with Dependencies command. After this is done, go to the following location on your project's source tree: <ProjectName>/application/target/netbeans_site/.
In this directory you will see a bunch of generated NBM files along with the catalog file called updates.xml. These are the files that you need to upload to your web server everytime a new version is released.
Notice that the directory also contains NBM files for Netbeans modules that your application uses, such as org-netbeans-api-progress-nb-RELEASE82.nbm which is the module that provides progress bars.
Setting Up the Update Center Server
The netbeans documentation says you need to publish the generated files to a web server. You can of course use this approach. But I have also experimented with other more simple solutions, such as using Github as the update center.
Basically you will commit and push changes to the catalog file and NBM files to a Github repository. And then you can leverage Github Pages as a web server to serve these files so that they can be accessed by your application.
-> Whenever you need to deploy an update, be sure you have incremented the module's specification version number. Read more.
Configuring the Update Center in Your Application
You can now go ahead and add a new module to your application, let's name it Update Center. Inside this module add a new file of type Update Center, located under the Module Development category.
In the wizard you will have to enter the URL to your descriptor (catalog) XML file. If you are using Github Pages then this should work just as well.
Updating The Application
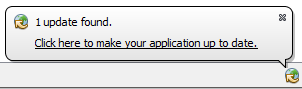
Now when you push new versions of modules to your Github repository, which include the required changes in NBM files and XML attributes, your application's Update Center client should be able to pick the changes and show a notification like the following:
Likewise you can go to Help > Check for Updates and you will see the list of new available module versions that you pushed to your repository.
Bonus: Automating With Continuous Delivery
So far in order for our users to be able to download and update new modules and features into the application, we need to build and push them first into the update center repository. This is time consuming and tedious. It would be better if everything happened automatically when publishing a new release.
Basically we want to achieve the following workflow:
- New releases are pushed to the
masterbranch of our source code repository. - A CI build is fired on the
masterbranch which builds and runs tests for the application. - If step 2 passes, the build commits and pushes the new NBM files and XML file to the update center repository.
I will be using TravisCI and Github to achieve this.
Creating a Github Access Token
We will need to create an access token on Github so that the build is able to push to the repository.
Once you have created the token, we will proceed to encrypt it and add it to the .travis.yml configuration. Our Travis file should look something like this:
language: java

jdk:
  - oraclejdk8

env:
  global:
    - REPO="my-update-center"
    - secure: "slk9090askllkkkdf..."

branches:
  only:
    - master
    - develop
Commiting and Pushing the Files
Now we need to create a script that will initialize the update center repository inside the build, move the files generated by Maven into the repository, add the files to source control, commit them and finally push them to the remote.
We can tell the build to execute this script as a custom deployment script, in the master branch only:
deploy:
  provider: script
  script: bash ./deploy_to_update_center.sh
  on:
    branch: master
=> Executing the script with bash allows us not to worry about the file's execution permissions inside the Travis machine. Read more here
The deploy_to_update_center.sh script is as follows:
#!/bin/bash

setup_git() {
  echo "Setting up git..."
  git config --global user.email "<your_email>"
  git config --global user.name "<your_name>"

  echo "Cloning repository ${REPO}"
  git clone https://${GH_TOKEN}@github.com/<user>/${REPO}.git
}

commit_build_files() {
  cd ${REPO}
  rm *

  # You should replace $GH_USER and $REPO_NAME (these are NOT env variables)
  # with the correct values inside your Travis build. You can find this path in
  # the build logs
  local BUILD_PATH="/home/travis/build/$GH_USER/$REPO_NAME/application/target/netbeans_site"

  # Move the generated files. You should include here all the module NBM files
  # you want to publish to the update center. We use a wildcard * so that we
  # don't have to specify the version.
  echo "Copying files from ${BUILD_PATH}"
  cp $BUILD_PATH/updates.xml .
  cp $BUILD_PATH/MyCustomModule-*.nbm .

  git add .
  git commit --message "Travis build: $TRAVIS_BUILD_NUMBER"
}

upload_files() {
  echo "Pushing files to ${REPO}"

  git remote add origin-update-center https://${GH_TOKEN}@github.com/<user>/${REPO}.git > /dev/null 2>&1
  git push --quiet origin-update-center master
}

setup_git
commit_build_files
upload_files
There are some things you will need to modify in that file so that it fits your use case. For example, the Github username where the repository is located at, the branch you are using for the update center (in my case, master), etc. etc.
And there you have it! A fully automized Netbeans Platform Update Center!
References
- updates.xml, etc, for Mavenized NetBeans RCP Application
- Understanding AutoUpdate Descriptors
- http://wiki.netbeans.org/DevFaqCustomUpdateCenter
- Creating a personal access token for the command line
- TravisCI Encryption keys
- https://gist.github.com/willprice/e07efd73fb7f13f917ea
- https://gist.github.com/Maumagnaguagno/84a9807ed71d233e5d3f