Loosely Coupled Node Actions in Netbeans Platform
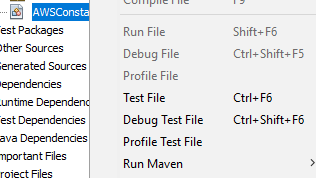
Nodes in Netbeans Platform can possess actions that can be executed with the node object as context. For example, the Project, Package, and Class nodes in the Netbeans IDE have a set of actions which can be seen by right clicking on the nodes:
In the Netbeans Platform tutorials I found a tutorial that explains how to add these actions to nodes. The problem is that in that tutorial the action class was created as an inner class of the node class. Making the action tightly coupled with the node.
I managed to implement a more modular and loosely coupled approach, which is what I will explain in this post.
Our loosely coupled approach will basically allow us to:
- Keep the domain logic (Java Beans and POJOs) in its own domain module.
- Keep the view logic (nodes that represent beans) in another module.
- Keep the node actions logic in yet another module. This allows us to plug and unplug different action's that belong to separate modules. Making our application's node actions very modular.
Let's begin!
Tracking Selection in Our View
For our example, let's assume that we are using a BeanTreeView to represent our nodes in our application. Naturally our node actions menu will be displayed when we right click on a selected node. Hence, we will first going to track the selection that happens in the BeanTreeView.
Here is an example of a BeanTreeView:

Create a new TopComponent in the explorer view. For this TopComponent we will implement the LookupListener and ExplorerManager.Provider interfaces. Also, we will instantiate a lookup result (which will contain the current selection) and an explorer manager (which is used to generate the nodes):
public final class BooksViewerTopComponent extends TopComponent implements LookupListener, ExplorerManager.Provider {

  private Lookup.Result<Book> result = null;
  private final static ExplorerManager em = new ExplorerManager();

}
Next, in the constructor we will associate the lookup and generate the nodes:
public BooksViewerTopComponent() {
  // Generated code...

  associateLookup(ExplorerUtils.createLookup(em, getActionMap()));
  em.setRootContext(new AbstractNode(Children.create(new BookChildFactory(), true)));
}
Keep in mind that I am assuming that the factories already exist and that we are operating with a Book bean.
Finally let's implement the necessary methods in our TopComponent:
@Override
public void componentOpened() {
  result = Utilities.actionsGlobalContext().lookupResult(Book.class);
  result.addLookupListener(this);
}

@Override
public void componentClosed() {
  result.removeLookupListener(this);
}

@Override
public ExplorerManager getExplorerManager() {
  return em;
}

@Override
public void resultChanged(LookupEvent evt) {
  // Will contain the current selection everytime it changes.
  Collection<? extends Book> allBooks = result.allInstances();
}
And that is all we need to track the top component's selection of nodes. To access it we only need to access the TopComponent's own lookup.
Creating Our Loosely Coupled Node Action
Since our node action will be loosely coupled, we will create a new module in our application. After that is done you can use the wizard to add a new context sensitive action on the Book object. In the end what we want is our action to look like this:
@ActionID(
        category = "File",
        id = "com.myapp.mymodule.AnalyzeBookAction"
)
@ActionRegistration(
        iconBase = "path/to/icon.png",
        displayName = "#CTL_AnalyzeBookAction"
)
@ActionReference(path = "Actions/BookNode")
@Messages("CTL_AnalyzeBookAction=Analyze Book")
public final class AnalyzeBookAction implements ActionListener {

  private final Book context;

  public AnalyzeBookAction(Book context) {
    this.context = context;
  }

  @Override
  public void actionPerformed(ActionEvent ev) {
    // Our custom action logic here
  }
}
There are quite a few important things going on here. First, is the @ActionReference annotation. We use this annotation to tell Netbeans Platform where we want to register our action. This could be a menu item, a toolbar, or in this case, the popup menu of a node. The magic here is the path parameter, which is a string that represents a path where Netbeans Platform will place the action. This is what gives us loose coupling. You will see how in just a bit.
=> The path string could be any path (if I am not mistaken). However notice how I use a very intuitive path consisting of the word “Actions” and the node which the action belongs to.
Another thing is this action's context. We are using a variable called context which is of the type of the class we are working with and that our nodes represent (a book, or books). When we declare this variable and also pass it in the constructor, Netbeans Platform automatically will treat this action as a context-sensitive action. This means that the action will only become enabled when a node is selected. Otherwise it will automatically become disabled.
Adding The Action To The Node's List of Actions
Now that we have created the action and we have registered it in a specific path. We will go to the module that contains our BookNode and add the action in the getActions method:
public class BookNode extends BeanNode<Book> {

  // ...

  @Override
  public Action[] getActions(boolean popup) {
    List<? extends Action> actions = Utilities.actionsForPath("Actions/BookNode");
    return actions.toArray(new Action[actions.size()]);
  }
}
Another great example of our loosely coupled design! In the method above, we retrieve all the actions in the path we mentioned before. Naturally this will fetch the action we created, so that it can too be displayed in the node's popup menu.
If you remember, in the tutorial I mentioned at the beginning, they hardcode the node action (which was an inner class) in this method. Creating tight-coupling between the node and the action, all in the same module.
You could also fetch other actions from different paths, as well as include built-in node actions such as Copy, Delete, etc.
Conclusion
In this post we managed to add a new node action to our application in a loosely coupled manner, using 3 modules:
- A module for domain logic
- A module for view logic
- A module for the new action
References
- http://wiki.netbeans.org/DevFaqActionContextSensitive
- https://blogs.oracle.com/geertjan/overriding-default-context-sensitive-action-enablement
- https://platform.netbeans.org/tutorials/nbm-selection-1.html
- https://platform.netbeans.org/tutorials/nbm-selection-2.html
- https://benkiew.wordpress.com/2012/12/28/netbeans-how-to-create-a-context-aware-action-with-an-icon-for-the-context-menu/